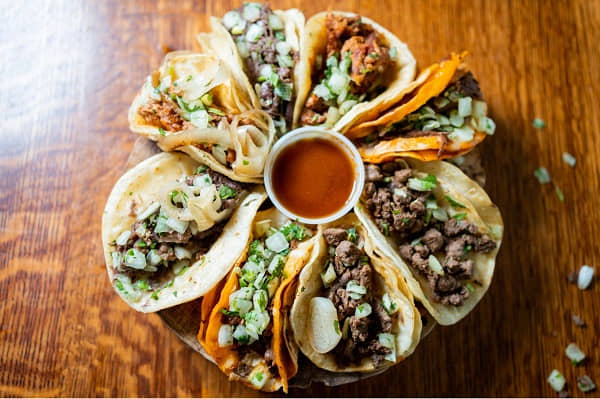
Are you tired of the same old chicken recipes? Look no further than this delicious Chicken Quesadilla recipe. This dish, made with juicy chicken, gooey cheese, and crispy tortillas, will surely become a family favorite.
Whether cooking for a crowd or just meal prepping for the week, this easy-to-follow recipe will satisfy any craving. So grab your ingredients and get ready to make a mouthwatering Chicken Quesadilla Recipe that everyone will love.
Important Factors to Consider When Making Chicken Quesadillas
Quality of Ingredients
- Chicken: When making chicken quesadillas, choosing high-quality chicken is essential. Opt for chicken breast or tenderloins free from any blemishes or bruises. You can also use leftover rotisserie chicken for added flavor.
- Tortillas: The type of tortilla you choose can have a big impact on the overall flavor of your quesadillas. Choose corn tortillas for a more traditional flavor or flour tortillas for a softer texture.
- Cheese: Cheese is an essential ingredient in quesadillas. Choose a high-quality cheese, such as cheddar, Monterey Jack, or queso fresco for maximum flavor.

Flavors and Seasonings
- Taco Seasoning: Homemade taco seasoning is an easy way to add flavor to your chicken quesadillas. Combine onion powder, garlic powder, dried oregano, cumin, chili powder, smoked paprika, and salt for a delicious seasoning mix.
- Peppers and Onions: Adding sautéed peppers and onions to your chicken quesadilla filling can add flavor and texture. Use a mix of bell peppers, jalapeños, and onions for maximum flavor.
- Garlic: Garlic is a classic flavor that can elevate any dish. Add minced garlic to your chicken filling for added depth of flavor.
Cooking Technique
- Pan-Frying: Pan-frying your quesadillas is the most common cooking technique. Fill a flour or corn tortilla with your chicken filling, cheese, and any extras, then fold it in half. Cook the quesadilla on a skillet over medium heat until both sides are golden and crispy.
- Grilling: Grilling your quesadillas can add a smoky flavor and crispy texture. Heat your grill to medium-high heat and cook the quesadillas for 2-3 minutes on both sides or until the cheese is melted and the tortillas are crispy.
Read more:
Tips for making perfect chicken quesadillas every time

How to avoid soggy or burnt quesadillas
- Use the right amount of filling: One of the most common mistakes when making quesadillas is overloading them with filling. While adding more chicken, cheese, and veggies might seem tempting, it can cause the tortillas to become soggy and difficult to manage.
- Preheat your pan: Preheat a non-stick pan over medium heat before cooking your quesadillas. This ensures that the tortillas cook evenly, preventing them from sticking to the pan.
- Don’t overcook: Overcooking your quesadillas can lead to burnt tortillas and dry filling. Keep a close eye on them and remove them from the pan once the cheese has melted and the tortillas are crispy and golden brown.
How to achieve crispy tortillas and melt-in-your-mouth cheese

- Use high-quality ingredients: Using fresh ingredients for your quesadilla filling will make a big difference in the final product. Opt for fresh veggies, quality cheese, and juicy chicken for the best flavor.
- Grate your cheese: Instead of using pre-shredded cheese, which often has anti-caking agents that prevent it from melting properly, grate it. This will give you a creamier texture and melt-in-your-mouth deliciousness.
- Use a combination of heat sources: Direct and indirect heat. Start by cooking the tortillas directly on the pan to get them crispy, then remove them and add the filling and cheese. Place the filled tortillas on a baking sheet and bake them in the oven for a few minutes to melt the cheese evenly.
Mexican Chicken Quesadilla Recipe
Prep Time
20 minutes
Cook Time
25 minutes
Total Time
45 minutes
Ingredients
FLOUR TORTILLA
- 310g or 2.5c AP Flour
- 8g or 1.25tsp salt
- 5g or 1 1/3tsp sugar
- 50g or 1/4c oil (canola, light olive)
- 180g or 3/4c water
CHICKEN + MARINADE
- 2 8oz chicken breasts (or another lean meat)
- 10g or 2 1/4tsp olive oil
- 10g or 1 2/3tsp salt
- Zest of 1 lime + juice ½ a lime
- 3-4 garlic loves, minced
- 2g or 1tsp black pepper
- 3g or 1 1/4tsp chili powder*
- 1g or .5tsp dried oregano
- Splash of tequila (Tbsp or so)
- 10g or 2 1/4tsp agave syrup
Instructions
- To make the tortilla, combine 310g flour, 8g salt, 5g sugar, 50g oil, and 180g water in a food processor. Process until dough forms a ball (20-30 seconds). Knead for 60-90 seconds until not sticky. Divide into four balls, cover, and let rest briefly.
- Flatten two 8oz chicken breasts into cutlets as the dough rests using a freezer bag and a saucepan. Marinate the chicken in a mixture of 10g olive oil, 10g salt, lime zest, minced garlic, black pepper, chili powder, dried oregano, lime juice, tequila, and agave/honey for 10-15 minutes before grilling or baking.
- For the tortillas, roll out the dough into 10-inch rounds that are 1/16 inch thick. Cook each tortilla in a nonstick pan for 1-2 minutes on each side until slightly browned.
- To make the quesadilla, heat a nonstick pan with oil. Place a tortilla on it and cover generously with shredded pepper jack, mild cheddar, and provolone cheese. Add grilled chicken and pickled jalapenos, then fold the tortilla. Cook for 1-2 minutes on each side until crispy and melty.
- To make chipotle ranch dipping sauce, blend mayo, lime juice, hot sauce, sour cream, chipotle chili, and garlic until smooth.
Enjoy your delicious homemade Mexican Chicken Quesadilla with a side of chipotle ranch sauce!

Hey readers! Chip Holland here, and I’m a Manager of this website. My passion for writing about it only matches my passion for BBQ. Follow my blog for mouth-watering recipes, tips, and tricks for the perfect smoke, grill, and BBQ. I’m sure you won’t be disappointed!