Little Debbie Valentine Cakes are a classic treat many people look forward to during the Valentine’s season. Known for their soft texture and delicious taste, these delightful snacks bring nostalgia and charm to the holiday.
The popularity of these cakes has inspired home bakers to recreate them, resulting in the emergence of copycat recipes that aim to replicate the original’s taste and texture.
The Allure of Little Debbie Snacks
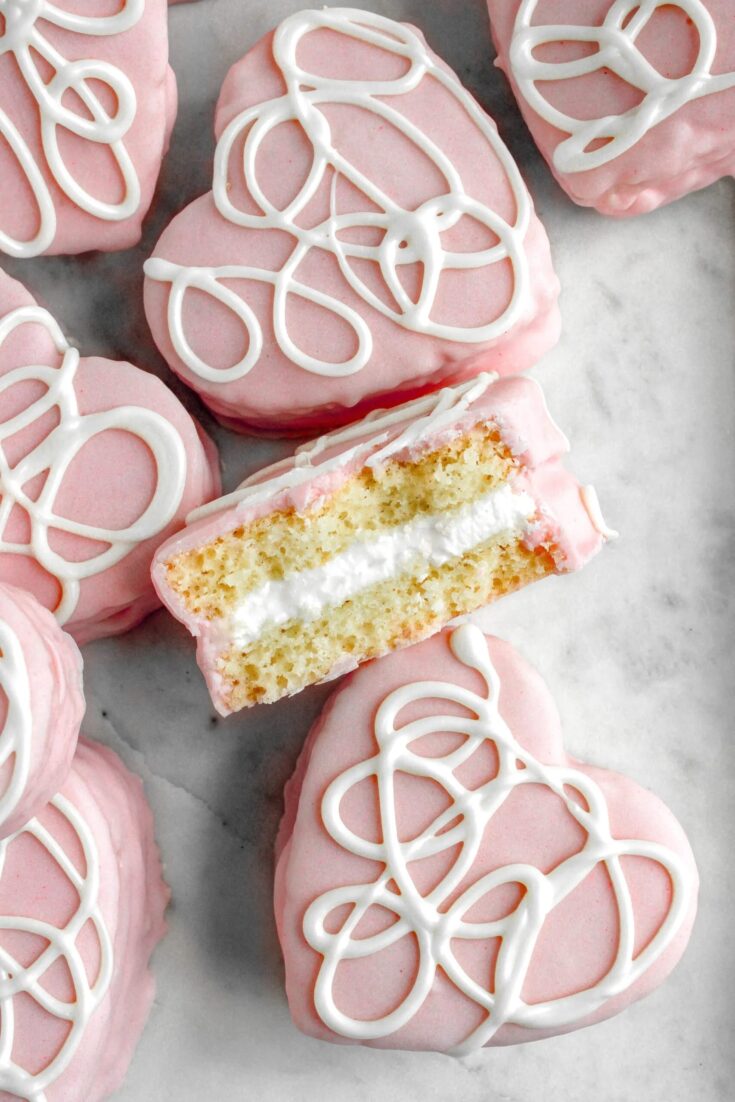
Established in 1960, Little Debbie has become a household name in the snack industry. The brand is synonymous with comfort food, offering a variety of treats, including the beloved Valentine Cakes. These cakes are characterized by their heart-shaped design, pink frosting, and a creamy filling. The success of Little Debbie can be attributed to its commitment to quality ingredients and nostalgic flavors.
")
Copycat Little Debbie Valentine Cakes – My Messy Kitchen
")
Copycat Little Debbie Valentine’s Day Cakes – The Squeaky Mixer
")
Homemade Little Debbie Christmas Tree Cakes – Cake by Courtney
")
Homemade “Be My Valentine” Cakes | Stephie Cooks
The Inspiration Behind Copycat Recipes
Copycat recipes have gained significant popularity with the growing trend of homemade baking and the desire for healthier or alternative options. Home bakers are inspired to replicate their favorite store-bought snacks, including Little Debbie Valentine Cakes. These recipes often appeal to those seeking to control the ingredients and customize flavors while still enjoying the nostalgic taste of their favorite treats.
Comparing Store-Bought and Homemade Versions
While store-bought Little Debbie Valentine Cakes are convenient, homemade versions allow complete control over the ingredients. Bakers can experiment with different flavors, fillings, and frostings by making these cakes at home.
In addition to flavor customization, homemade versions may offer a fresher taste and the option to use higher-quality ingredients. This focus on quality can appeal to those with dietary restrictions or preferences for organic or non-GMO products.
The Role of Baking in Celebrating Valentine’s Day
Baking has long been a cherished activity associated with Valentine’s Day. Creating a dessert for loved ones adds a personal touch and demonstrates care and affection. Making copycat Little Debbie Valentine Cakes can be a fun and engaging activity for families, couples, or friends.
The process of baking together fosters connection and can be a way to create lasting memories. Additionally, having a variety of treats to share enhances the festive atmosphere of Valentine’s Day.
Including Unique Twists in Recipes
While copycat recipes aim to stay true to the original flavors, many bakers enjoy adding their unique twists. Some might incorporate flavors like raspberry or almond to enhance the traditional chocolate and vanilla profile. Others may experiment with different fillings or create layered cakes for a more decadent experience.
These creative adaptations not only personalize the treat but can also impress guests or loved ones during Valentine’s gatherings. Adding sprinkles, edible glitter, or even themed decorations can elevate the visual appeal and add to the festive vibe.
Copycat Little Debbie Valentine Cakes
Ingredients
- **For the cake:
- 1 box white cake mix
- 1 cup granulated sugar
- 1 ⅓ cups water
- 3 eggs room temperature
- 1 tbsp vanilla extract
- 2 tbsp vegetable oil
- 1 cup all-purpose flour
- ½ tsp kosher salt
- 1 cup full fat sour cream
- **For the filling:
- 7 oz marshmallow creme you can also use marshmallow fluff
- ¾ cup salted butter room temperature
- 2 cups powdered sugar
- 1 ½ tsp vanilla extract
- ¼ tsp kosher salt
- 2-4 tbsp heavy cream room temperature
- **For the coating:
- 32 oz almond bark
- 3 tbsp crisco
- pink gel food dye it must be gel based or the chocolate can seize
Instructions
Step 1: Prepare for Baking
- Preheat the Oven: Set the oven temperature to 350°F (175°C).
- Prepare the Baking Pans: Spray and line two half sheet pans (18×13-inch) with parchment paper.
Step 2: Make the Cake Batter
- Mix the Ingredients
- In a stand mixer or with a handheld mixer, combine the boxed cake mix, sugar, water, eggs, vanilla, and oil.
- Mix for approximately 1 minute until combined.
- Add Dry Ingredients
- Add flour, salt, and sour cream to the mixture.
- Mix on medium speed for 2-3 minutes until smooth with no lumps.
- Divide and Smooth
- Evenly divide the batter between the two prepared pans.
- Smooth the tops for even baking.
- Bake the Cakes
- Place in the oven and bake for 15-18 minutes or until fully cooked.
- Allow the cakes to cool at room temperature for 30 minutes, then refrigerate for 30-60 minutes.
Step 3: Prepare the Filling
- Beat Filling Ingredients
- In a stand mixer or with a handheld mixer, beat together marshmallow creme and butter on medium-high speed until smooth, about 1 minute.
- Add Remaining Ingredients
- Gradually mix in powdered sugar, vanilla, salt, and 2 tablespoons of heavy cream or milk.
- Continue mixing on medium speed, adding more cream if necessary until the filling is spreadable but not too thin.
Step 4: Assemble the Hearts
- Cut Out the Hearts
- Once the cakes have cooled, use a 3-inch cookie cutter to cut out 32 heart shapes.
- Fill and Stack Hearts
- Spread the filling on top of half of the heart shapes and place the other half on top to create heart sandwiches.
- Chill Heart Shapes
- Place on a jelly roll sheet pan lined with wax paper or parchment paper and freeze for 1 hour.
Step 5: Prepare the Coating
- Melt Almond Bark
- In a large heatproof bowl, melt the almond bark incrementally, heating for 30 seconds at a time and stirring in between.
- Add Crisco
- Stir Crisco into the melted almond bark until completely smooth.
- Coloring the Chocolate
- Reserve ½-1 cup of the white almond bark in a separate bowl for decoration.
- Mix ½ teaspoon of pink gel food dye into the remaining melted almond bark and let it cool for 3-5 minutes.
Step 6: Dip and Decorate
- Dip the Cakes
- Dip each frozen heart cake into the pink chocolate mixture, ensuring they are fully coated.
- Place the dipped cakes onto a cookie rack covered with wax paper or parchment paper.
- Allow to Set
- Allow the chocolate coating to set for about 10 minutes.
- Drizzle Decoration
- Drizzle the reserved white chocolate over the coated cakes in random circles to create a decorative effect.

Hey readers! Chip Holland here, and I’m a Manager of this website. My passion for writing about it only matches my passion for BBQ. Follow my blog for mouth-watering recipes, tips, and tricks for the perfect smoke, grill, and BBQ. I’m sure you won’t be disappointed!