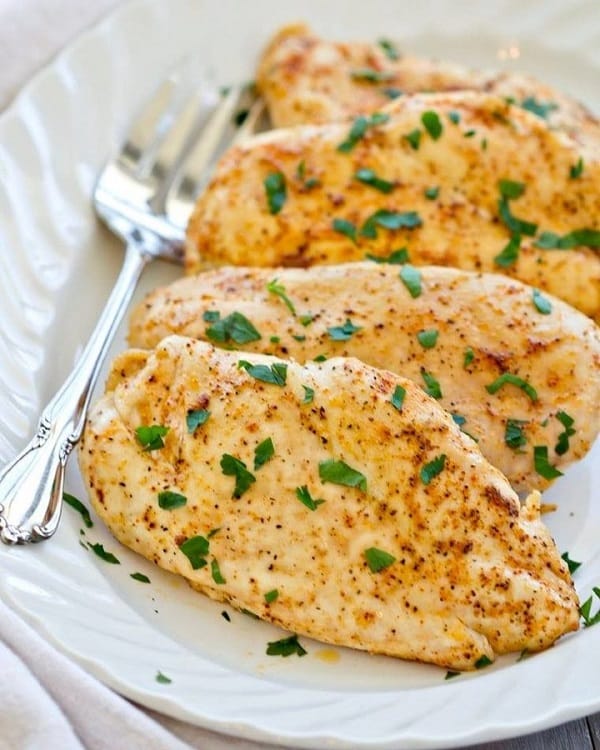
Are you looking to make a quick and easy chicken breast dinner tonight? Wondering how long to bake chicken breast at 400 to ensure it’s perfectly cooked? Look no further! This article will dive into the best tips and tricks for baking chicken breast at 400 degrees. We’ll cover the recommended cooking times based on the weight and thickness of your chicken breasts and some helpful tips for achieving juicy and flavorful results. So, set your oven to 400 degrees, and let’s start making a delicious and hassle-free chicken dinner tonight!
What is Chicken Breast?
Chicken breast is one of the most popular cuts of chicken. It is widely used in many cuisines worldwide and is a lean, healthy choice for those looking to watch their fat and calorie intake.
Chicken breast is the meat on the underside of the chicken and is the most tender and leanest cut. It is white and has very little fat. It is usually cut into thin slices, making it easier to cook quickly.
Chicken breast can be cooked in various ways, such as grilled, baked, fried, stir-fried, and sautéed. It is also very versatile and can be used in various dishes and recipes. It is often used in tacos, wraps, salads, and sandwiches. It can also be served on its own as an entrée or as an accompaniment to other dishes.
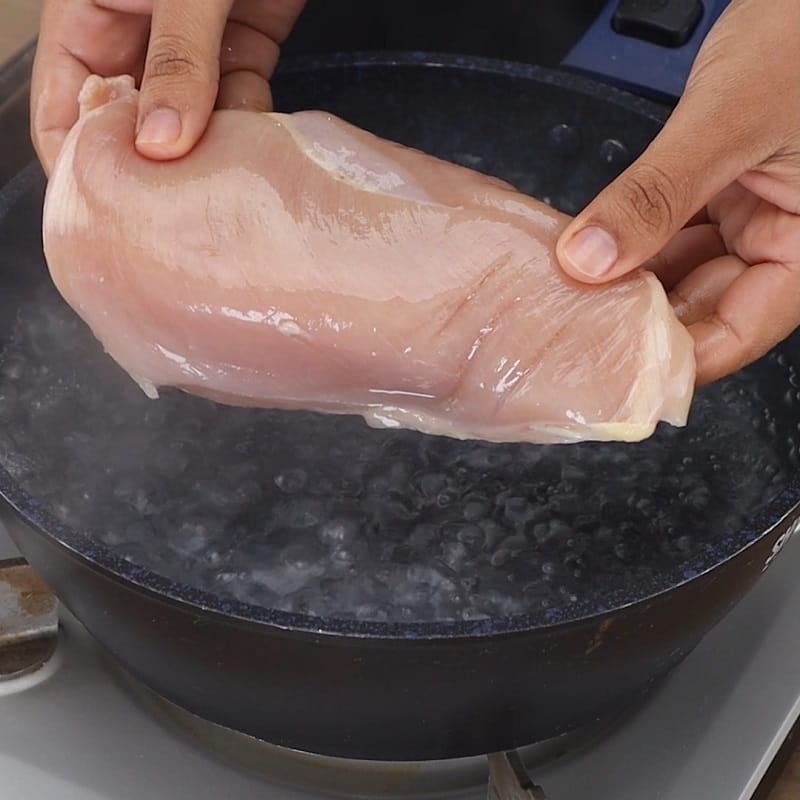
When buying chicken breast, look for pieces that are fat-free and have pale pink coloring. Make sure the chicken is fresh and not frozen. When preparing chicken breast, it is essential to cook it properly. If it is not cooked correctly, it can become tough and dry.
Chicken breast is an excellent source of lean protein, vitamins, and minerals. It is low in fat, calories, and cholesterol. Additionally, it is a great source of niacin, phosphorus, and selenium.
How Long To Bake Chicken Breast At 400?
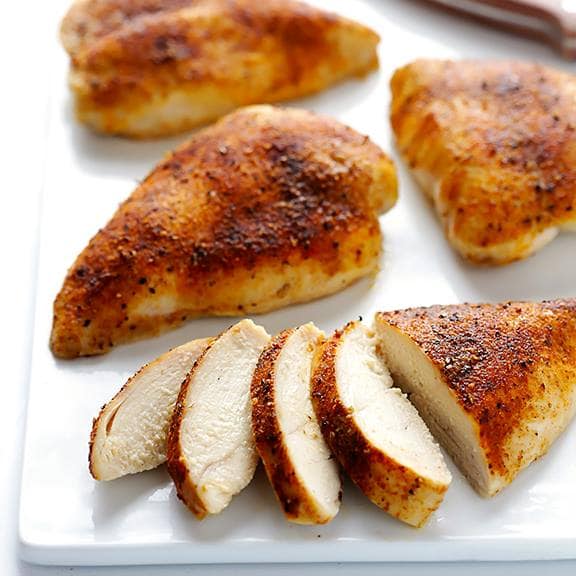
When it comes to baking chicken breast at 400°F, the cooking time varies based on the size and thickness of the meat. Typically, boneless and skinless chicken breasts of approximately one-inch thickness should take between 20 to 30 minutes. However, a medium-sized chicken breast that weighs about 4 to 6 ounces can take approximately 22 to 26 minutes to cook fully.
How Long To Bake Chicken Breast At 400 In Foil?
If you’re looking for an easy and delicious way to cook chicken breast, baking it in foil at 400°F is a great option. Boneless chicken breasts should be baked in foil at 400°F for 25-30 minutes, depending on their size. It is important to ensure the chicken is cooked, so using a meat thermometer to check the temperature at the 30-minute mark can be helpful. For those who prefer to cook chicken without foil, it may take slightly longer to bake through.
How Long To Bake Chicken Breast At 400 In Air Fryer?
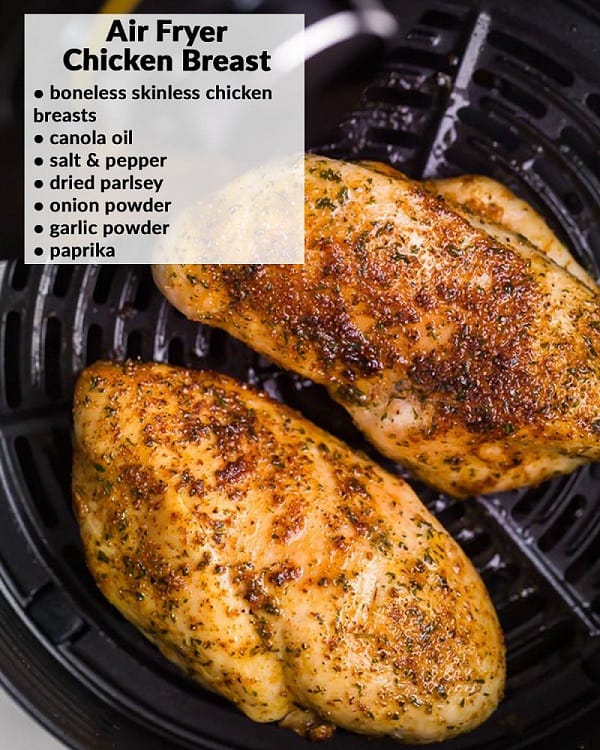
Boneless and skinless chicken breasts of approximately one inch should be cooked for 7-8 minutes in an air fryer preheated to 400°F. The chicken should be flipped over at four minutes to ensure it cooks evenly on both sides. For boneless chicken breasts that weigh four ounces each and are half an inch thick, the cooking time is between 12-15 minutes, depending on their size.
It’s important to note that the air fryer should be preheated, and the temperature should be closely monitored to prevent overcooking or undercooking the chicken. Baking chicken breast at 400°F in an air fryer is a quick and convenient way to prepare a healthy and delicious meal.
How Long To Bake Chicken Breast At 400 In Oven Baked Uncovered?
Factual data suggests that baking chicken breast uncovered in a 400 F oven should take approximately 20-30 minutes. The exact time will depend on the size and thickness of the chicken breast. For boneless and skinless chicken breasts, the baking time should range from 20 to 25 minutes, while bone-in chicken breasts may take a little longer, around 30 minutes.
To ensure the chicken is safe to eat, it is crucial to check its internal temperature. A food thermometer will help confirm that the chicken has reached 165 F, the minimum safe temperature for poultry.
How Long To Bake Frozen Chicken Breast At 400?
When cooking frozen chicken breast, it’s important to know the right baking time to ensure that it’s cooked thoroughly but not overdone. Baking frozen boneless, skinless chicken breasts at 400°F takes around 50-60 minutes, while bone-in chicken breasts take around 60 minutes. It’s recommended to bake them without overlapping and covering them for the first 20 minutes before exposing them to allow for even cooking.
One can estimate a 40-50% longer cooking time for frozen meat than thawed ones. Breaded chicken breasts at 400°F should take around 20-25 minutes, and those in foil packets can take 30-35 minutes. It’s essential to check the internal temperature of the chicken, which should reach 165°F/74°C, and rest it for 5 minutes before serving.
How Long To Bake Bone-in Chicken Breast At 400?
In general, it’s recommended to bake boneless chicken breasts at 400°F for around 20-25 minutes. This way, the chicken will be cooked and remain juicy, all while ensuring it reaches a safe internal temperature. One important thing to remember is to sear the chicken in a hot oven before baking it, as this helps it cook evenly and retain moisture.
Is It Better To Bake Chicken Breast At 350 Or 400?
Is it better to bake chicken breast at 350 or 400? This is a common question among home cooks, as the proper oven temperature can make the difference between a succulent and juicy chicken breast or a dry, rubbery one.
The answer to the question of what temperature to bake chicken breast depends on a few factors. The size of the chicken breast, the cooking method you’re using, and your desired outcome all need to be considered.
- One of the most important factors to consider is the size of the chicken breast. Large chicken breasts, such as those used for chicken parmesan, require higher cooking temperatures to cook through without drying out. For these, you should bake the chicken breast at 400 degrees Fahrenheit.
- On the other hand, small chicken breasts, such as those used for stir-fries, require a lower temperature to cook without drying out. For these, you should bake the chicken breast at 350°F.
- It is also important to consider the cooking method you are using. If you are baking the chicken breast in the oven, you should use a higher temperature of 400°F. However, if you are cooking the chicken breast in a skillet or on the grill, you should use a lower temperature of 350°F.
- Finally, it is important to consider your desired outcome. If you want your chicken breast to be juicy and succulent, you should bake it at a lower temperature of 350°F. If you want the chicken breast to be more crispy, you should bake it at a higher temperature of 400°F.
Read more:
- Can You Grill Frozen Chicken
- How Many Chicken Breasts In A Pound
- How Long To Smoke Chicken Breast At 250
- How Long To Bake Pork Chops At 375
Do I Need To Preheat The Oven Before Baking Chicken Breasts?
The short answer is yes, you do need to preheat the oven before baking chicken breasts. Preheating the oven ensures that the chicken breasts cook evenly and at the correct temperature.
When you preheat the oven, you are allowing the oven to reach its optimal temperature for baking. This optimal temperature for baking chicken breasts is typically 350-400 degrees Fahrenheit. Preheating the oven to the correct temperature also helps to ensure that the chicken breasts cook evenly throughout. If you do not preheat the oven, you may end up with undercooked chicken breasts that may be chewy or dry.
To preheat the oven, turn it on to the desired temperature and allow it to reach the optimal temperature before placing the chicken breasts in the oven. It is important to remember to wait the extra few minutes to preheat the oven. This will ensure the chicken breasts cook evenly and at the correct temperature. It is also important to remember to check the temperature of the chicken breasts with an instant-read thermometer to ensure that they are cooked to the correct temperature. The optimal internal temperature of chicken breasts is 165 degrees Fahrenheit.
Although preheating the oven is an important step when baking chicken breasts, it is also important to remember that ovens come in all shapes and sizes. Therefore, checking your oven’s user manual or instructions is essential to determine the ideal temperature for baking chicken breasts. Once you have preheated the oven and placed the chicken breasts in the oven, you should also remember to check the temperature of the chicken breasts with an instant-read thermometer at regular intervals throughout the baking time.
Is There A Difference In Cooking Times Between Bone-In And Boneless Chicken Breasts?
Cooking chicken breasts can be tricky for many home chefs, as there is often a big difference in the cooking times between bone-in and boneless varieties. However, you can easily get the perfect results for both chicken breasts with the right technique and a few tips.
One of the most important things to remember when cooking chicken breasts is that boneless chicken breasts cook faster than bone-in varieties. Generally, boneless chicken breasts will take 10-15 minutes less than bone-in chicken breasts. This is because boneless chicken breasts are thinner and have less fat, so they cook faster.
When cooking boneless chicken breasts, the best way to ensure they are cooked through is to use a meat thermometer. The internal temperature of the chicken should reach 165°F before it is considered safe to consume. Be sure to insert the thermometer into the thickest part of the meat.
On the other hand, bone-in chicken breasts require a little more attention when it comes to cooking times. It’s important to ensure that the chicken is cooked through to ensure that it is safe to eat. A meat thermometer can also be used to check that the internal temperature of the chicken has reached 165°F. Bone-in chicken breasts take longer to cook, so giving them a few extra minutes in the oven is essential.
It’s also important to remember that the size and thickness of chicken breasts can affect cooking times. Thicker chicken breasts will take longer to cook, so it’s a good idea to opt for thinner cuts of meat if possible.
Should The Chicken Breasts Be Seasoned Before Baking?
The answer to this question depends on various factors, and ultimately, it is up to the individual cook to decide whether or not to season their chicken breasts before baking.
When deciding whether or not to season chicken breasts before baking, the first thing to consider is the dish’s overall flavor. If the dish is intended to have a bold, savory flavor, it is usually best to season the chicken breasts before baking. This will give the dish a more complex flavor and allow the seasonings to absorb into the chicken. However, suppose the dish is intended to have a delicate, subtle flavor. In that case, it may be best to skip the pre-baking seasoning, as the seasonings may overpower the delicate flavor.
The next thing to consider is the type of seasonings to use. If the dish is intended to have a spicy flavor, it is best to use spices like cayenne pepper or chili powder. If the dish is intended to have a more mild flavor, then it is best to use seasonings like garlic powder, onion powder, dried herbs, and paprika.
Finally, when deciding whether or not to season the chicken breasts before baking, the cook’s preference should be taken into account. Some cooks prefer to season the chicken before baking, while others prefer to season the breasts after being cooked. Ultimately, it is up to the individual cook to decide whether or not to season their chicken breasts before baking.
Is There A Certain Way I Should Arrange My Chicken Breasts On The Baking Sheet For Even Cooking?
When it comes to baking chicken breasts, there are a few different options that you can try. You can either place them side by side or stagger them, depending on the size of your baking sheet. If you’re baking a small batch of chicken breasts, you may be able to fit them all side by side; if you’re baking a larger batch, you may need to stagger the chicken breasts on the baking sheet.
Regardless of which option you choose, it’s important to remember that the thicker the chicken breast, the longer it will take to cook. If you place thin chicken breasts side by side, they’ll cook faster than thicker ones. If you stagger them, then the thickest chicken breasts will cook last.
If you’re baking chicken breasts with skin on, it’s best to place the skin side up. This will help protect them from drying out as they cook. If you’re baking chicken breasts without skin, you can place the skin side down to help make sure they don’t dry out.
No matter which method you choose, give the chicken breasts enough space on the baking sheet. Crowding the chicken breasts together can cause them to steam rather than bake, leading to soggy and unevenly cooked chicken.
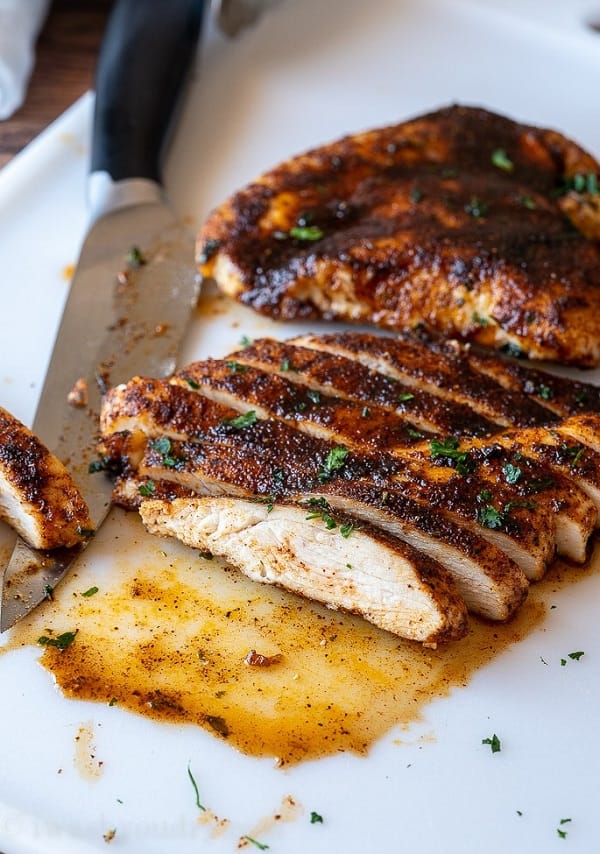
Are There Any Tips To Getting Crispy Skin On My Baked Chicken Breasts?
Crispy skin is a must-have for any chicken dish and can be tricky to achieve. You can use some simple tips to get that delicious, crunchy skin you crave.
- First, start by choosing the right chicken breasts. Look for breasts with a good amount of fat on them, as this will help keep the chicken moist and juicy. Skin-on chicken breasts are also great for getting that crisp skin, as the skin provides an extra layer of protection against the oven’s heat.
- Next, season the breasts generously. Salt is essential for getting that crisp skin, so season the breasts well with salt and other herbs and spices of your choice.
- Before baking, let the chicken breasts rest at room temperature for about 15 minutes. This will allow the seasoning to penetrate and give you a more evenly cooked and flavorful chicken.
- Bake the chicken breasts at a high temperature, around 400 to 425 degrees Fahrenheit. This will help give the chicken that nice, crispy skin.
- Finally, brush the chicken breasts with oil or melted butter before baking. This will help keep the chicken breasts from sticking to the baking sheet and give them a nice golden color.
Does Oiling Or Buttering My Chicken Before Baking Have Any Effect On The Cook Time Or Texture Of My Finished Product?
Oiling or buttering your chicken before baking is a great way to keep your chicken juicy, flavorful, and delicious. But does it have any effect on the cook time or texture of your finished product? It depends on what type of oil or butter you choose to use and how much of it you use.
To start, let’s talk about oiling your chicken. Oiling your chicken before baking will help keep it from drying out and help it stay juicy, flavorful, and delicious. However, it will not have a great effect on the cooking time. If you oil your chicken too much, it can cause it to cook unevenly and lead to a dry and tough texture. The best way to oil your chicken is to use a light coating of high-quality oil, such as olive or canola oil, and rub it lightly before baking.
Now let’s talk about buttering your chicken. Buttering your chicken before baking is a great way to add flavor and keep it from drying out. The added fat from the butter can help create a crispy and flavorful crust, but it will also cause the cooking time to increase slightly. If you want to cut down on the cooking time, try using a combination of butter and oil or a light coating of oil and a small amount of butter.
Overall, the effect that is oiling or buttering your chicken before baking it will have on the cook time and texture of your finished product will depend on the type of oil or butter used and how much of it is used. When choosing an oil or butter, go for a high-quality product that won’t add too much fat and will allow your chicken to cook evenly.
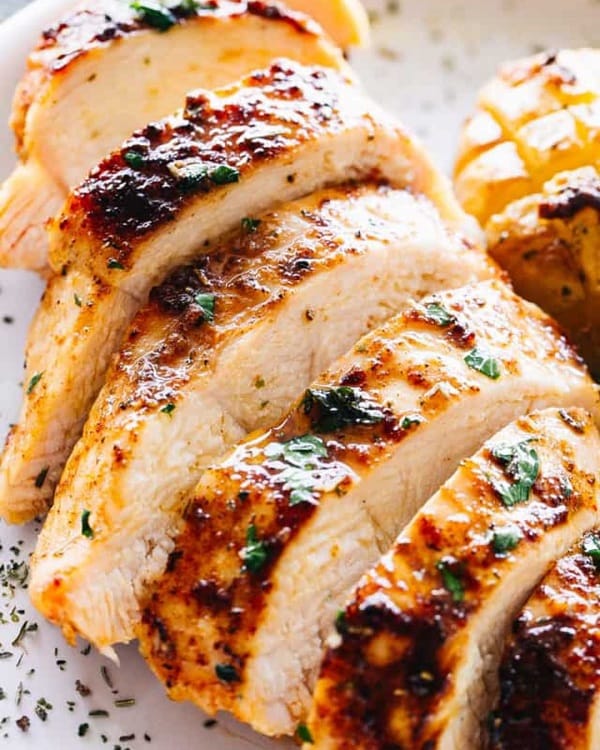
How Do You Know When The Chicken Breasts Are Fully Cooked?
There are a few reliable ways to tell when your chicken breasts are cooked through. The most accurate method is to use an instant-read thermometer. When the internal temperature of the chicken reaches 165°F (74°C), it is safe to eat. Make sure to insert the thermometer in the thickest part of the chicken breast to get an accurate reading.
Another method is to take a look at the color of the chicken. A cooked chicken breast should be opaque and white. If it still looks pink inside, it needs to cook a bit longer. The juices should also run clear when the chicken is pierced with a knife or fork.
Finally, you can tell if the chicken breast is cooked through by feeling it. When the chicken is done, it will feel firm to the touch. If it feels spongy or squishy, then it needs to cook a bit longer.
What Is The Recommended Internal Temperature For Chicken Breasts?
When cooking chicken breasts, the recommended internal temperature is 165°F (74°C). This temperature is crucial to ensure the chicken is safe and free from harmful bacteria. Whether you’re grilling, baking, or frying your chicken breasts, using a meat thermometer to check the internal temperature is essential. Remember that once you remove the chicken from the heat, it will continue to cook, so be sure to remove it at precisely 165°F to avoid overcooking.
Tips For Baking Perfect Chicken Breast

Baking chicken breast isn’t as difficult as it might seem, and with a few tips and tricks, you can make delicious, juicy, and flavorful chicken breast every time.
First and foremost, you need to start with the right chicken cut. For optimal results, use boneless and skinless chicken breasts. This way, you won’t have to worry about dealing with the skin and bones.
Once you have your chicken, it’s time to prep it. If you’re using frozen chicken, thaw it in the refrigerator before cooking. If you’re using fresh chicken, you’ll want to pat it dry with a paper towel before baking. This will help the chicken cook more evenly and help the seasoning adhere.
Now it’s time to season your chicken. You can use just about any seasoning you like, but some of the most popular options include garlic powder, paprika, and Italian seasoning. If you’re feeling adventurous, you can even make your blend.
Once your chicken is seasoned, place it on a baking sheet lined with parchment paper. This will help prevent the chicken from sticking to the pan and will also help to keep the juices inside.
Finally, it’s time to bake your chicken. Preheat your oven to 350 degrees Fahrenheit and bake your chicken for 25-30 minutes or until the internal temperature reaches 165 degrees Fahrenheit.
What Is The Best Way To Cook Chicken Breast?
When it comes to chicken breast, the two most popular cooking methods are grilling and baking. While both of these methods can yield delicious results, each has its unique advantages. For example, grilling is a great way to quickly cook chicken breast, while baking allows you to cook the chicken at a lower temperature, which helps to preserve its moisture and tenderness.
Grilling is a great option if you’re looking for a quick and easy way to cook chicken breast. The key to successful grilling is to preheat the grill to a high temperature, season the chicken with your favorite seasonings, and cook it over direct heat until it reaches an internal temperature of 165°F. This method will give you a perfectly cooked, juicy, and tender chicken breast.
If you have more time and want to infuse your chicken with flavor, baking is the way to go. Season the chicken with herbs and spices, brush it with olive oil, and bake it in a preheated oven at 350°F for approximately 20 minutes to achieve the best results. Baking chicken breast is an excellent way to bring out the flavor and ensure it is cooked evenly and thoroughly.
No matter which method you choose, it’s important to remember to let the chicken rest for a few minutes before serving to allow the juices to redistribute throughout the breast. This will ensure that you get a juicy and flavorful finished product.
What Are Some Good Side Dishes To Serve With Baked Chicken Breasts?
A simple green salad is a classic side dish that pairs perfectly with baked chicken breasts. You can make a basic version with just a few ingredients or jazz it up with some extras like nuts, cheese, or dried fruit for extra flavor. Adding a light dressing like olive oil and lemon juice will combine the flavors.
If you’d like to make your side dishes more substantial, roasted vegetables are always a great option. Any combination of vegetables like carrots, potatoes, and bell peppers will make a delicious meal. Season the vegetables with herbs like rosemary, thyme, and oregano to make them even more flavorful.
Another delicious side dish to serve with baked chicken breasts is couscous. Not only is couscous easy to make, but it’s also incredibly versatile. You can make it sweet, savory, or even spicy, depending on the flavors you’d like to incorporate.
If you’re looking for something more comforting, mashed potatoes are always a crowd-pleaser. There are so many ways you can make mashed potatoes. For example, you can add butter, cream cheese, herbs, garlic, or even bacon to give them an extra flavor kick.
Lastly, grains like quinoa, farro, or wild rice make a great accompaniment to baked chicken breasts. These grains are high in protein and fiber and can be cooked in various ways. Whether you opt for a simple stovetop version or a delicious salad, these grains can be a great addition to your meal.
How To Store Baked Chicken Breast?
The best way to store baked chicken breast is to keep it in an airtight container or wrapped tightly in cling wrap. Make sure to label the container with the date the chicken was cooked so you know when it was made and when it should be eaten. It is best to store cooked chicken breast in the refrigerator and consume it within four days.
If you’d like to store baked chicken breast for longer, it can be frozen. Before freezing, ensure that the chicken is completely cooled. Place the chicken in a sealed plastic bag and insert it into the freezer. Frozen chicken breast should be eaten within four months for optimal freshness.
When it’s time to eat the frozen chicken breast, it’s important to thaw it properly. The best way to thaw frozen chicken is to place it in the refrigerator overnight. Once it’s thawed, it’s important to cook the chicken immediately. You can also use the microwave to thaw chicken quickly, although this should be done with caution as cooking chicken too quickly can lead to dryness.
How Long To Bake Chicken Breast At 400 – FAQs
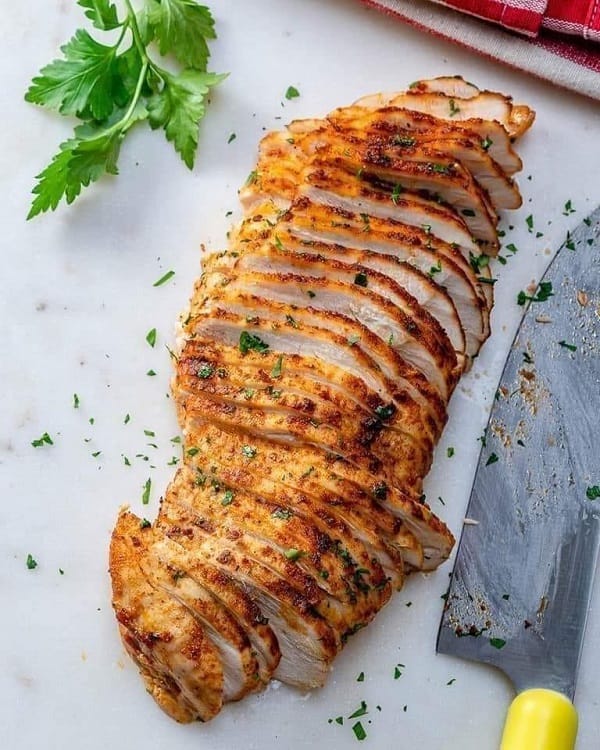
How Long Should You Let The Chicken Breasts Rest Before Slicing Them?
If you are cooking chicken breasts, it’s essential to let them rest for a few minutes before slicing. This allows time for the juices to redistribute throughout the meat, resulting in a more tender and flavorful dish.
Let the chicken breasts rest for at least 10 minutes after cooking to ensure they remain juicy and delicious. Some recipes may call for a shorter or longer resting time, so following the instructions is essential. After resting, the chicken breasts can be sliced and served, with many cooks recommending slicing against the grain for the best texture.
Should The Chicken Breasts Be Covered With Foil While Baking?
According to factual data, covering chicken breasts while baking is unnecessary. However, some recipes suggest covering them to keep them moist and flavorful. While covering chicken breasts with foil may speed up the cooking process, it is not recommended as it can result in steamed, less crispy skin. Therefore, it is ultimately up to personal preference and the following recipe.
How Long Can The Baked Chicken Breasts Be Stored In The Refrigerator Or Freezer?
According to the USDA’s recommendations, cooked chicken can be stored in the fridge for three to four days if properly sealed in a ziplock bag or container. For more extended storage, it’s better to freeze it, where it can last for up to four months. To ensure maximum safety, leftover cooked chicken should be refrigerated at 40°F or below within two hours of cooking. If you’re planning to freeze it, label it with the date it was cooked and use it within four months.
Is There An Optimal Internal Temperature For Baked Chicken Breast To Ensure It Is Cooked Thoroughly But Not Dried Out And Tough?
According to the USDA, chicken breasts should always be baked to an internal temperature of at least 165°F to avoid the risk of salmonella. However, cooking the breast to a higher temperature can produce a dry and tough texture. For juicy, tender chicken breast, experts recommend baking it at 425°F and checking the internal temperature with a meat thermometer.
The ideal temperature for perfectly cooked chicken breast is 150°F, which should be kept at this temperature for at least three minutes. By following these guidelines and being cautious about temperature, anyone can cook delicious and healthy chicken breast.
Is It Safe To Eat Baked Chicken That Isn’t Cooked Through Yet?
Undercooked chicken can be dangerous as it may contain bacteria that can cause food poisoning. While some might think it is safe to eat baked chicken that isn’t cooked all the way through, this is not recommended. Consuming raw or undercooked chicken, even if only partially uncooked, can lead to severe health issues such as stomach pains, nausea, and diarrhea.
What Can I Do With Leftover Chicken Breast?
Luckily, we are plenty of delicious and easy options. We can use it in a chicken pot pie casserole, soups, salads, pasta bakes, and more. If they want something with a bit of Mexican flair, we can try skillet enchiladas suizas. For a simple lunch, we can mix it into chicken salad or stuff it into a hard shell or tortilla with chopped tomatoes, avocado, and pickled jalapeno. Additionally, leftover chicken can even be used in chicken mac and cheese.
Is 425 Too High For Chicken Breast?
Baking chicken breast at 425 degrees Fahrenheit will help seal the chicken’s juices and flavor, resulting in a deliciously juicy and tender meal. The cooking time will vary depending on the thickness of the breast, but generally, it should take between 20-25 minutes to cook the chicken breast at this temperature. It is important to avoid leaving the chicken breast in the oven for too long, but with proper timing and attention, baking chicken breast at 425 degrees can be a great way to achieve perfectly cooked and flavorful meat.
What Is The Best Temperature For Baking Chicken Breast?
Chicken breast baking at 375°F (190°C) allows the chicken to cook through thoroughly without drying it out. It’s also important to ensure that the internal temperature of the chicken reaches 165°F (75°C) for safe consumption. However, some people prefer cooking at higher temperatures, like 425°F (220°C), while others find that 400°F (204°C) is perfect for their recipe.
So, The best temperature for baking chicken breast might vary depending on your desired level of crispiness and the thickness of the chicken breasts.
Is It Better To Bake Chicken Covered Or Uncovered?
That depends on what you are looking for in your chicken. If you want crispier skin, then it’s best to leave it uncovered. On the other hand, if you’re after a tender and juicy piece of chicken, covering it ensures that it doesn’t dry out. Chicken breasts, in particular, may benefit from a light cover to keep them moist. However, if you’re aiming for that ideal crispy skin, it’s recommended to forego the foil or parchment. Remember to bake chicken uncovered so the skin crisps up and turns an appealing golden color.
Conclusion
So, if you’re wondering how long to bake chicken breast at 400°F, the answer is between 20-30 minutes. Of course, the exact time will depend on the size and thickness of your chicken breasts and any other ingredients you may be adding. To make sure your chicken is cooked through, use an instant-read thermometer to check for an internal temperature of 165°F. With these tips, you can have delicious and properly cooked chicken in no time!
References:
- https://cooking.stackexchange.com/questions/4428/can-chicken-not-completely-cooked-then-cooled-be-fully-cooked-later
- https://healthyrecipesblogs.com/how-to-bake-chicken-breast/
- https://www.cdc.gov/foodsafety/chicken.html
- https://www.thekitchn.com/how-to-cook-golden-juicy-chicken-breast-on-the-stove-248171

Hey readers! Chip Holland here, and I’m a Manager of this website. My passion for writing about it only matches my passion for BBQ. Follow my blog for mouth-watering recipes, tips, and tricks for the perfect smoke, grill, and BBQ. I’m sure you won’t be disappointed!